Resource Collections
Group resources into reusable collections you can assign to clients.
Resource Collections Overview
Resource Collections let you bundle files, links, videos, and documents from your Resource Library into curated collections that you can share with clients. Each collection is organized into sections with configurable display layouts, giving you full control over how clients experience your content. Find them under the Resource Collections tab in the sidebar, where you can create, edit, duplicate, delete, and assign collections to individual clients.
Each collection consists of:
- A name and optional description
- A cover image (choose from 20 defaults or upload your own)
- One or more sections, each containing resources imported from your Resource Library
- A display format per section that controls how resources appear to clients
From the collections list you can see:
- Resource Collection: the name and cover image
- Resources: total number of resources across all sections
- Clients: how many clients currently have access
Creating a Resource Collection
Your new collection appears in the list. Click it to open the collection builder where you can add sections and resources.
Setting a Cover Image
Every collection has a cover image that appears in the collection list and as the header when clients view it. You can choose from the built-in library or upload a custom image.
Adding Sections
Sections let you organize resources within a collection by topic or category. Every collection needs at least one section before you can add resources.
The new section appears in the builder. You can add as many sections as you need. If the collection has no sections yet, you will see an empty state prompting you to create your first one.
Adding Resources to a Section
Resources are imported from your Resource Library (the Vault). You must have resources uploaded to your library before you can add them to a collection.
The resource is added to the section immediately. Resources that already exist in the section are automatically excluded from the list to prevent duplicates.
Resource types you can add
Resources in your library fall into two categories, each with subtypes based on the file or link content:
| Category | Subtypes | Examples |
|---|---|---|
| Documents (uploaded files) | Image, Video, PDF, Doc, File | Workout PDFs, form templates, progress photo guides |
| Links (external URLs) | Website link, YouTube, Loom, Vimeo | Tutorial videos, blog posts, product pages |
Each resource displays a type badge (e.g. "PDF", "youtube.com", "Video") so clients can tell at a glance what kind of content it is.
Section Display Formats
Each section has its own display format that controls how resources are rendered for clients. You can mix and match formats across sections in the same collection.
| Format | Description |
|---|---|
| List | Compact rows with a thumbnail, name, and type badge. Best for text-heavy resources like articles and documents. |
| Card | Full-width vertical cards stacked on top of each other. Each card shows a cover image with the resource name overlaid. Good for a clean, magazine-style layout. |
| Carousel | Horizontally scrollable cards that show roughly 1.2 cards at a time, encouraging the client to swipe. Ideal for video content or visual resources you want to highlight. |
| Grid | Two-column grid of square cards. Good for visual content like images or video thumbnails where you want to show many items in a compact space. |
The format change takes effect immediately. The live phone preview on the right side of the builder shows how the section will look in the mobile app.
Editing a Collection
You can update the name, description, and cover image of an existing collection at any time.
From the collection list
From inside the collection builder
Editing a Section
Removing a Resource from a Section
The resource is removed from the section but remains in your Resource Library. You can re-add it later if needed.
Reordering Resources
You can change the order resources appear within a section.
Reordering Sections
You can change the order sections appear in a collection.
Deleting a Section
Duplicating a Collection
Duplicating creates a copy of the collection with the same sections, resources, and cover image. The duplicate has no clients assigned.
The new collection appears in your list ready to edit.
Deleting a Collection
Assigning Collections to Clients
Once your collection is ready, you grant individual clients access. Clients receive a notification when they are added.
Granting access
Each client you add receives an in-app push notification with the collection name so they know new content is available.
Revoking access
The client loses access immediately and the collection disappears from their app.
Automating Collection Access with Onboarding Flows
You can automatically grant collection access when a client purchases a package by adding collections to an Onboarding Flow.
When a new client purchases that package, they automatically receive access to the specified collections, no manual assignment needed.
For a full guide on setting up Onboarding Flows, see the Onboarding Flow article.
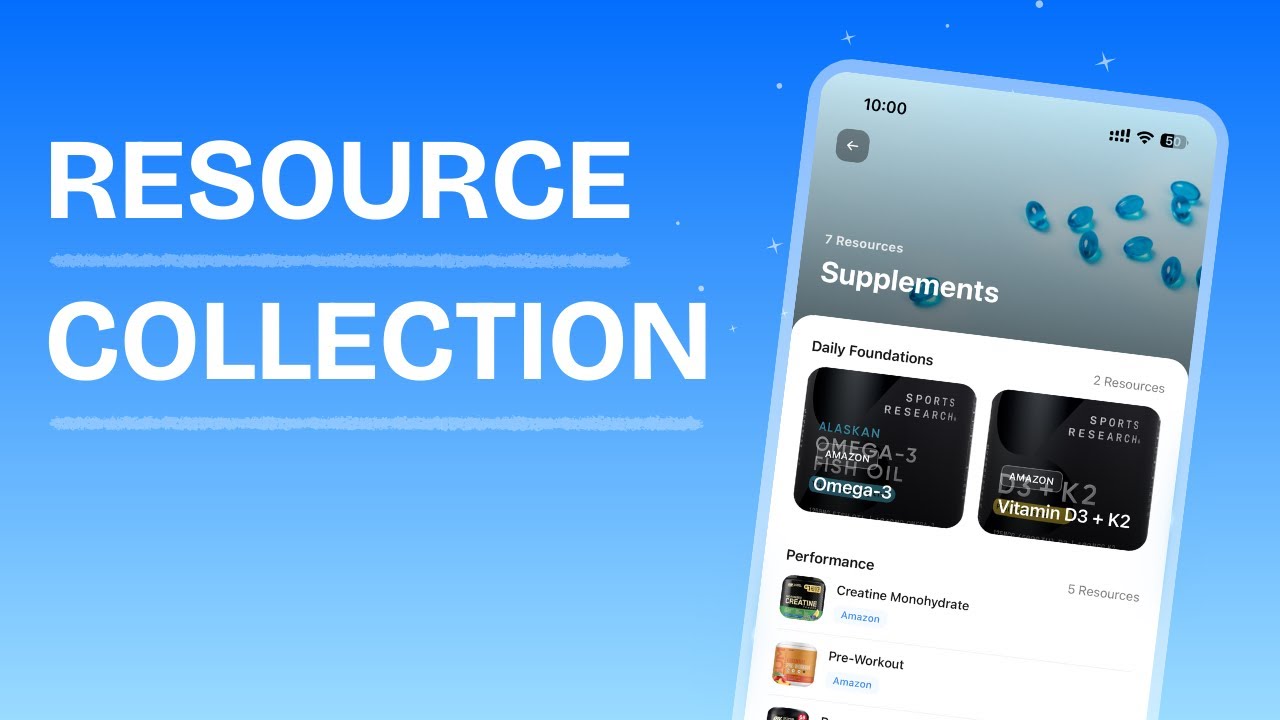
How Clients View Collections
Clients see their assigned collections in the Resource Collections section of the app. Each collection shows its cover image, name, and resource count. Tapping a collection opens it with sections displayed in the layout format you configured.
When you grant a client access, they receive a push notification. If you revoke access, the collection disappears from their app immediately.
Frequently Asked Questions
Can clients add or edit resources in a collection? No. Collections are read-only for clients. Only coaches can add, remove, or reorder resources.
What happens if I delete a resource from my library? It is automatically removed from all collections that contain it.
Can I share the same collection with multiple clients? Yes. Use Manage Access to grant access to as many clients as you need.
Why can't my client see a collection I shared? Make sure the client has been granted access via Manage Access. If they still don't see it, have them pull down to refresh the Resource Collections screen.
Can clients download files from a collection? No. Clients can view shared resources in the app but cannot download them.
Can I reorder my collections? No. Collections are displayed in the order they were created. This cannot be changed.
What is the recommended aspect ratio for cover photos? 16:9.
Did this answer your question?