Onboarding Flow
Design the step-by-step experience new clients see when they sign up.
What Is an Onboarding Flow?
An onboarding flow is a reusable automation template that runs whenever a new client joins, no matter how they arrive: manually, via a purchased package, or through a Zapier automation. Define it once, and HubFit can automatically:
- Assign workout programs, nutrition plans, check-ins, questionnaires, habits, and metrics
- Grant access to resources, resource collections, recipe books, workout studios, and communities
- Apply client tags for organization and filtering
- Enroll the client in challenges
- Import autoflow templates to their calendar
- Assign a team member to manage the client
- Control which features the client can see and use in the app
You can create as many flows as you need — one per package, one per client type, or any combination that fits your business.
Assignable Item Types
Each onboarding flow can include items from 16 categories, organized across three tabs in the flow builder.
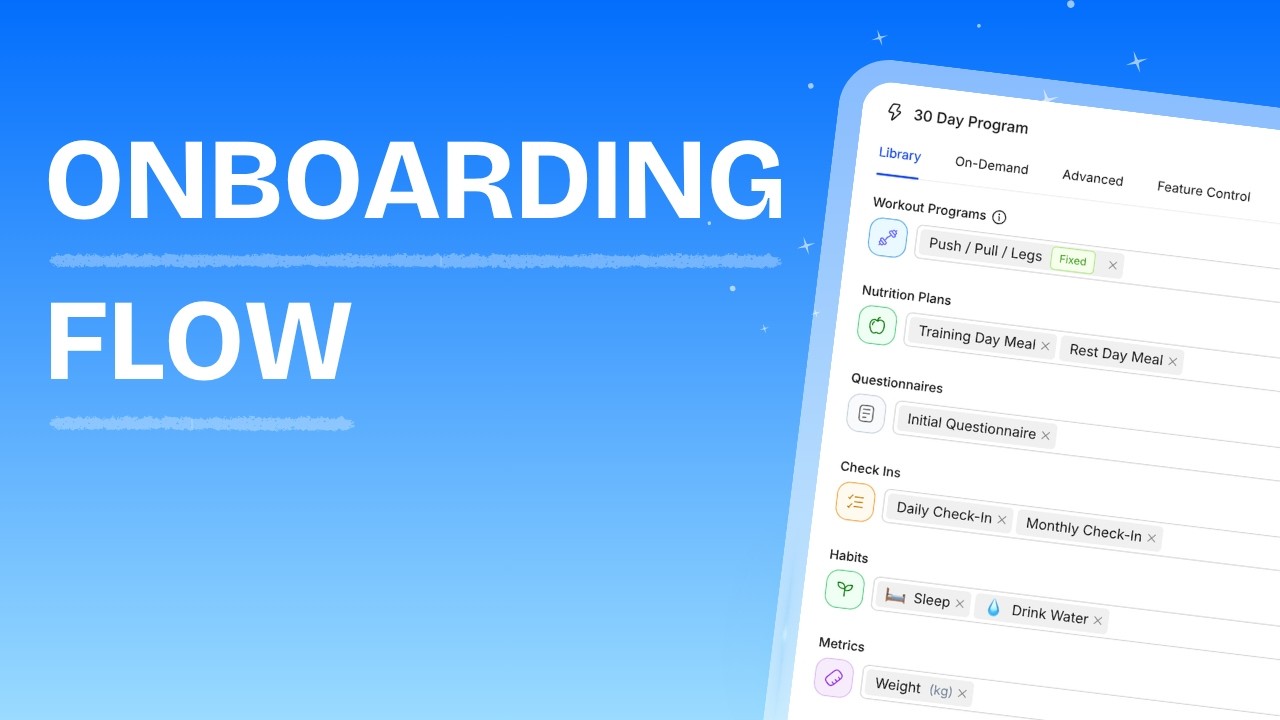
Library Tab
These are your core coaching items — the content most clients need from day one.
| Item Type | What It Does |
|---|---|
| Workout Programs | Imports workout programs to the client. Calendar programs start from the current date. A single flow can include Calendar programs or Fixed programs, but not both. |
| Nutrition Plans | Imports meal plans or macros plans to the client's nutrition page. |
| Questionnaires | Assigns questionnaire forms for the client to complete. |
| Check-Ins | Copies check-in form templates to the client's check-in list. |
| Habits | Assigns habits to the client. Duration-based habits calculate their end date from the current date. |
| Metrics | Creates metric tracking entries for the client (e.g. weight, body fat, measurements). |
| Resources | Imports individual vault resources (files, links, videos) to the client's vault. |
On-Demand Tab
On-demand items give clients access to self-serve content libraries.
| Item Type | What It Does |
|---|---|
| Resource Collections | Grants the client access to curated resource collections. |
| Recipe Books | Grants the client access to shared recipe book collections. |
| Workout Studio | Grants the client access to on-demand workout studio content. |
Advanced Tab
Advanced items handle organization, community, and team workflows.
| Item Type | What It Does |
|---|---|
| Client Tags | Applies tags to the client for filtering and segmentation. |
| Challenges | Enrolls the client in active challenges. Ended challenges cannot be selected. |
| Communities | Adds the client as a participant in community forums. |
| Autoflow | Imports autoflow calendar templates starting from the current date. |
| Assign Team Member | Assigns the client to a specific workspace team member. |
Feature Toggles
The Feature Control tab in the flow builder lets you show or hide specific sections of the client app. When a flow runs, these settings are applied to the client's account, controlling exactly what the client sees when they open the app.
There are 10 toggles grouped into three sections:
General
| Feature | Default | Description |
|---|---|---|
| Messaging | On | Client can message you through the platform |
| Check-Ins | On | Client can view and submit check-ins |
| Habit | On | Client can view and track habits |
| Photos | On | Client can upload progress photos |
| Metrics | On | Client can view and input metrics |
| Vault | On | Client can access resources in the vault |
Training
| Feature | Default | Description |
|---|---|---|
| Workout | On | Client can view assigned workout programs |
| Workout Tracker | On | Client can log workouts in the tracker |
Nutrition
| Feature | Default | Description |
|---|---|---|
| Nutrition Plans | On | Client can view assigned nutrition plans |
| Nutrition Tracker | On | Client can log food and track macros |
Creating an Onboarding Flow
Configuring a Flow
After creating a flow, click on it to open the flow builder. Select items across the four tabs — Library, On-Demand, Advanced, and Feature Control — then click Update Flow to save.
You do not need to fill every category. Add only the items relevant to the client experience you are designing — empty categories are skipped when the flow runs.
Editing a Flow
There are two ways to edit a flow:
Edit the flow name — Click the three-dot menu on a flow row and select Edit. This opens a modal where you can update the flow name.
Edit the flow automations — Click anywhere on the flow row (outside the three-dot menu). This opens the full four-tab flow builder where you can change assigned items and feature toggles.
Changes take effect immediately for future flow executions. Clients who were already onboarded with the previous version are not retroactively updated.
Duplicating a Flow
The duplicate is an independent copy — changes to one flow do not affect the other. All assigned items and feature toggles are copied.
Deleting a Flow
Linking a Flow to a Package
The most common way to trigger an onboarding flow is by linking it to a package. When a client purchases the package, the flow runs automatically.
When a client completes their payment for this package, HubFit executes the linked onboarding flow. All items are assigned, features are configured, and tags are applied — instantly and without any manual action from you.
Adding a Client with a Flow
You can also select an onboarding flow when manually adding a new client.
The flow executes immediately after the client is created. The client receives all assigned content and feature settings before they even open the app for the first time.
You can also trigger onboarding flows via Zapier, allowing you to automate onboarding based on external events like form submissions, payments, or CRM updates.
Frequently Asked Questions
Can I apply an onboarding flow to an existing client? No. Onboarding flows can only be applied when creating a new client — either manually, through a package purchase, or via Zapier. To set up an existing client, assign their content manually from their profile.
What happens if I edit a flow after clients have already been onboarded? Changes only apply to future clients. Clients who were already onboarded keep whatever content they received at the time. To update an existing client, make changes directly on their profile.
Can I link the same flow to multiple packages? Yes. The same flow can be linked to as many packages as you need. Each time a client purchases any of those packages, the flow runs independently for that client.
My client purchased a package but their content is missing — what happened? Check that the flow is linked to the correct package in the package's Automations step. Also verify the payment completed successfully — the flow only triggers after Stripe confirms payment. If specific items are missing, the item may have been deleted from your library after the flow was created.
Can I run a flow more than once for the same client? No. Each trigger event runs the flow once per client. If you need to re-apply content, assign it manually from the client's profile.
Do clients see the onboarding flow? No. Onboarding flows are a coach-side tool. Clients simply see the content — workouts, nutrition plans, resources, etc. — appear in their app automatically.
Did this answer your question?